As an Amazon Associate we earn from qualifying purchases.
After spending a significant amount of money on studio monitors, you would want them to sound perfect. But just as choosing the right monitor is important, so is setting it up. The placement of studio monitors has a great impact on how they will sound. This is where a studio monitor placement calculator comes in.
There are a few tips and calculations everyone should know before setting up studio monitors. Whether you are placing the monitors in a commercial studio or a home studio, placement positions are important.
Table of Contents
Near-field vs. Far-field Monitors
Before placement, deciding the kind of monitor is important. Understand that you cannot use a far-field monitor in a small home studio, because of size restrictions. But a near-field studio monitor can be used in a large studio.
In fact, many commercial studios use both setups. Far-field studios are superior in working out the best bass levels for music that will be played in stadiums and clubs. Near-field studios are better at higher frequencies and vocals. Since commercial studios work on a larger range of production, they usually set up both near-field and far-field monitors.
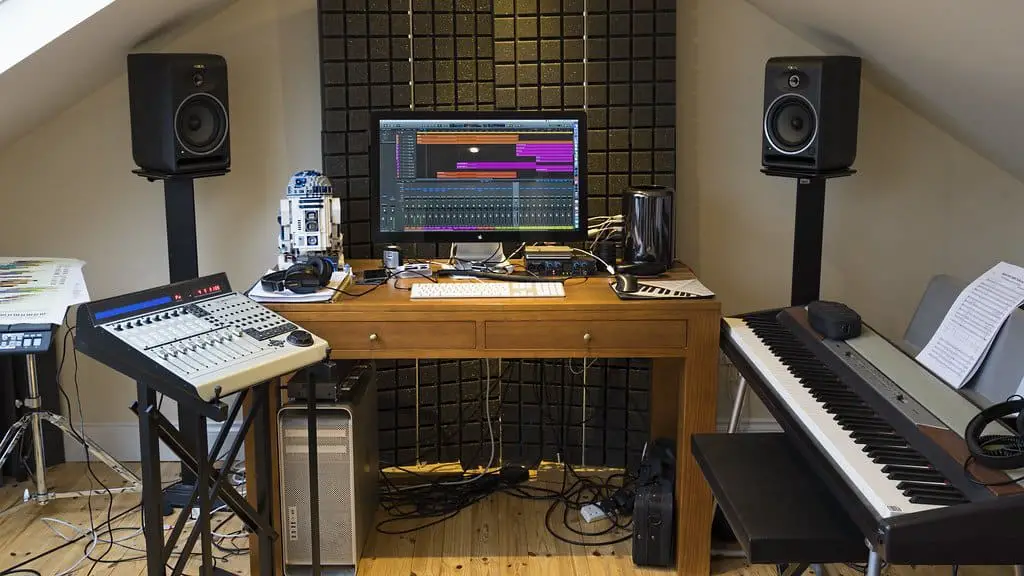
For far field monitors, vibrations and echo are major problems. Studios opting for these monitors use many acoustic treatment methods to make the space more monitor friendly. Monitors are mounted farther from the mixing desk and walls are covered with foam panels, among other methods.
Understanding the Space
Before placing your studio monitors, you should understand your studio space. You may not be able to do much about the dimensions of the room. But understanding how the dimensions and distances will affect the sound is important. It will also help you decide on the right powered monitors.
If you are working in a commercial studio, it’s probably a large space. For a home studio, it can be a room of any dimensions. Room modes are an important factor to consider. They are the result of sounds vibrating off different surfaces of the room.
For a rectangular room, three basic room modes are length, width and height, for three primary dimensions. If these dimensions are same (for cubic rooms) or two or all three dimensions are multiples of each other, unwanted resonance will be produced.
The most important room mode to treat is the length one, also called axial mode. This affects the sounds more than the other two modes. One method to fix this is by calculating and using specifically designed software to find the best and worst spots in your room.
More frequently though, they can be treated by the correct placement of sound emitting sources: Monitors. You can use stands and try multiple arrangements, until you find the right placement against room modes.
Most accepted and efficient arrangement is placing the monitors facing the farthest wall. In a rectangular room of 10 feet by 15 feet, the monitors should be placed with their back to either of the 10 feet walls. This way, the sound they emit will travel more before echoing back. Length will counteract most of the resonance and wave distortion issues.
Angle of the Monitors
This is perhaps the simplest calculation for the placement of monitors. Remember what an equilateral triangle is? This is what you should make with your monitors. And it’s not just about the angle or length, it’s about facing your monitors the right way as well.
Face your triangles towards yourself, then place them in a way that there is a 60 degree angle between yourself and either monitor. This way, the distance between the monitors, and the distance between each monitor and you would be the same.
This arrangement will let you hear the perfect overlap of both monitors without the sound reflections. The perfect sweet spot.
Distances and Symmetry
Symmetry is a generally desirable attribute in monitor placement. Just like the monitors are equidistant to you, they should be to the walls on either side. For example, if your monitors are placed against the 10 feet wall and they are 3 feet apart, the distance of either monitor should be about 3.5 feet from their respective walls.
The same is not true for the wall behind the speakers. While both speakers should be equidistant to the wall itself, they should not be the same distance to the sides. For 3.5 feet distance on the sides, go for either 2 feet or 4.5 feet in the back.
It is important to not cram the monitors. They need a little room to breathe. More accurately, enough room for bass dispersion, phase cancellation and other problems with acoustics.
For a regular room, reflections and frequency response of the room dictates where you should sit for the best hearing. For example, let’s consider a 16 feet long room.
If you sit in the middle of the room, at 8 feet line, most low frequencies will sound very high. If you sit at the 4 feet line or the 12 feet line (25% and 75% from the starting wall), these low frequencies will sound quieter than they are.
An optimal point is considered at 38% of the distance from the main wall. In our 16 feet long room, it would be around 6 feet from the main wall. This should be your seating position in the room.
Height of the Monitors and Speaker Stands
Monitors, especially the tweeters should be ear level to you. Since high frequencies are much more directional than low ones, it’s necessary to be ear level to them for most accurate listening. After placing the monitors at the right angles and distances, sit and make sure that your ears are in line with your tweeters.
This is usually hard with the default mixing desk configuration. Unless you have a desk specifically designed for your equipment. So even if it feels like an additional expense, invest in speaker stands. Better go for stands with adjustable height and angles.
It is also important that your monitors are NOT placed midway between your floor and ceiling. If your room is 10 feet in height, the speakers should either be at 4-4.5 feet or 5.5-6 feet.
No Reflective Surfaces
It’s not only important to protect your monitor output from reflecting off walls, but the sound reflecting off any hard surface is just as bad. Make sure your speakers are not reflecting off your desktop, which is the usual hard-surface culprit.
To visually analyze the situation, you can use a mirror on your desktop and look from your sitting position and see if you can see the monitor. If you can see it, choose absorption materials for your desk. It would be much better than rearranging and disrupting previous calculations.
Adjusting the Monitors
Companies who make monitors are well aware of all the placement problems. They usually provide a number of features and settings to counteract them. These acoustic tuning settings allow you to fine tune the output from your monitors.
When you have gone through the whole monitor placement regimen, use these settings to adjust the sound coming from your speakers. There are a lot of options to make the sound just right.
Acoustic Treatment
No matter how many calculations you perform in an empty room, they won’t translate into great and accurate sounding monitors. Adjust, place and set the monitors once the room is fully furnished. Only then you will be able to gauge the correct output of your monitors.
In furnishing, you can acoustically treat your room. We don’t want you spending as much as commercial studios do, but a carpet, the right curtains and light furniture can make a lot of difference. For a particularly stubborn room, some cheap sound absorption panels can help with creating the perfect sweet spot.
Conclusion
You will notice that we used very few numbers in what we called the monitor placement “calculator”. The reason is simple; there are too many variables and different configurations. Some definitive calculations cannot be provided for perfect monitor placement.
In fact, after following all the above steps, trial and error would be the best method for the perfect monitor placement. You will be constantly makings minor adjustments at first, until the sound you hear is just perfect. It may seem like a chore, but the beautiful music you produce in the end, will make it worth all the effort.
Amazon and the Amazon logo are trademarks of Amazon.com, Inc, or its affiliates.